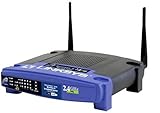
Linksys-Cisco WRT54GL Wireless-G Broadband Router (Compatible with Linux)
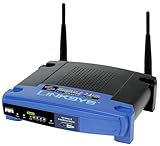
Linksys WRT54GS Wireless-G Broadband Router with SpeedBooster
My 5 years old Netgear (WGR614v2) router started dropping wireless connections which made me really annoyed. So I finally decided to buy a new wireless router.
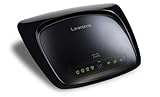
It was a very difficult decision to decided which wireless router, but since I wanted to try the DD-WRT firmware and it was most likely supported in Linksys router series , I started searching WRT54G models. But then there were several WRT54G series which made me confusing.
After spending some time to compare models I bought WRT54G2. It appears that WRT54GL is the most compatible router with DD-WRT, but I chose the G2 because I thought it was the most recent version of the WRT54G series and comes with the best quality which was an incorrect assumption. But most of all, G2 was cheaper than GL about 10 bucks around 45 bucks.
Ok, so I tested the wireless connection out of the box without DD-WRT, and it was working nice, not dropping any connection even if I visited graphic intensive websites.
And then I performed the DD-WRT firmware setup for WRT54G2 using this URL – Linksys WRT54G2 Flash Instructions from DD-WRT.COM website.
You will have to be really careful and closely follow the instruction. Otherwise you will brick your router which means corruptting the router and it will not operate normally again. During the process, you will upload three files one by one and the router will reboot each time. Unlike the instruction, my router didn’t reboot by itself after each data file uploading. So I manually rebooted the router. Just make sure that you wait enough time (usually about 5 mins) before you manually reboot as mentioned in the instruction
Please note that only DD-WRT micro version is supported for WRT54G2. Also there is no way to revert it back to the original Linksys firmware as of this writing. If you are considering to purchase Linksys wireless router to try DD-WRT, make sure you buy better routers such as WRT54GL which supports full DD-WRT version. For the complete supported device list , check out HERE.
Luckily, it appeared that I successfully updated the firmware that I was able to login to admin website by connecting http://192.168.1.1 . The default ID is blank and Password is ‘admin’.
Everything looked very nice, even though it was micro version, there are more options than I needed. What I really liked about the firmware were the wireless client connection status and graphical bandwidth usage page. It provides detailed information about the current status of the routing that I really loved it.
However, it seemed that the wireless connecting quality was degraded compared to the original Linksys firmware. Connection became unstable and slower than before. I tried everything googling everywhere but the quality did not improved as I hoped.
Now I wanted to go back to original Linksys firmware, but I found out that there was no way to go back as of now. There was only one way. To wait until the developers come out with the solution to revert back to the original state.
I was terrified and felt really bad of myself installing DD-WRT without checking out more carefully. I searched all the website intensibly for the solution to stabilize my wireless connection and tried every possible wireless options.
And finally I have the wireless connection stabilized and now I am so relieved that I didn’t waste my money. I will show my DD-WRT settings in the next blog entry.
Thank you for reading my blog and enjoy!
Here are the setup procedure and other resource links related to DD-WRT. Please make sure you read them all thoroughly before installing DD-WRT.
- DD-WRT General Installation Guide
- Linksys WRT54G2 specific Flash Instructions from DD-WRT.COM website
- Wikipedia DD-WRT page
- Lifehacker DD-WRT blog
Here is my next blog article on the tuning the settings.

 But there is PAUSE/BREAK key at the perfect location. And the DELETE key is located 2 keys to the left from the PAUSE key. I was trying very hard to get used with the layout, but it was absolutely uncomfortable!
