They used to charge high prices for the commercial SSH client software.(SecureCRT is one of them) Then this free SSH client was released in the Internet. And we are able to enjoy secure shell environment for free! Thanks to Simon Tatham. Below is the excerpt from the PuTTY homepage.
PuTTY is a free implementation of Telnet and SSH for Win32 and Unix platforms, along with an xterm terminal emulator. It is written and maintained primarily by Simon Tatham.
If you are a developer or a system admin , you may access to the UNIX server using telnet application everyday. Telnet uses a simple raw data transmission without encryption , so if you use telnet over the public Internet, your authentication data(Password) may be captured and viewed by anyone with the right tool and the motivation. It is very vulnerable and not recommended.
SSH (Secure Shell) is similar to telnet but it is very secure. It encrypts the data before the transmission, so you can rest knowing that your password is safe with you.
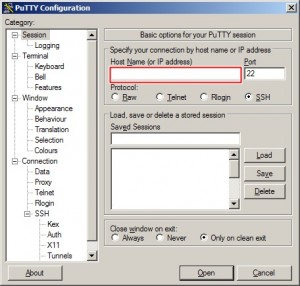
When you first run the application, you will see the screen looks like above image. You can right connect to the SSH server right away by typing in the IP or domain name of the host in the HOSTNAME field and press Enter key.
There are various options and settings that you can change by using the items in the left pane. (Windows Color, Font size)
There are few settings that you may want to change before starting a session.
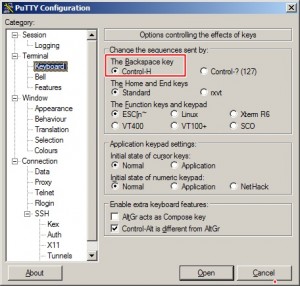
1. Backspace Key: By default, Control-?(127) is the Backspace key, but you may need to set to Control-H.(It depends on the server’s setting).

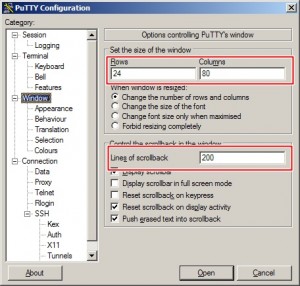
2. Change the default number of row and columns. Usually people like to set to larger value than the defaults (24 Rows, 80 Columns) . Also, increase the lines of scrollback to a larger value (5000). This indicates the lines to keep in the screen buffer.

You can update the Windows color , font color, and sizes for better view.
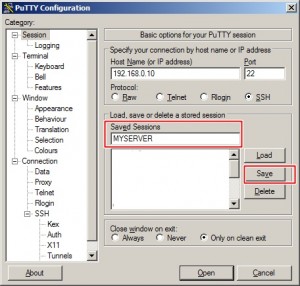
After updating the settings, save those settings ( session ) and easily load the settings later. First type in the unique name as the profile name in the “Saved Session” text field and click on the Save button.
Then the new profile name will appear in the list box located right below. Now you can simply double click the entry to load and connect to the server.
- Website : http://www.chiark.greenend.org.uk/~sgtatham/putty/
- Download – There is a download version that you can download and use it right away without installation.

